Surface Defects, Rust, and Finish Preparation
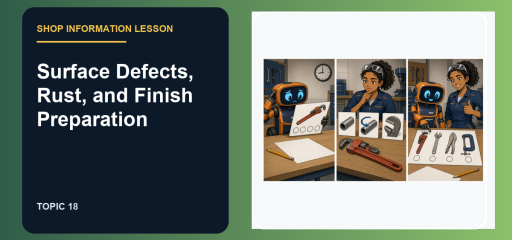
A clean-looking surface is not automatically ready for a finish or a fastener. A burr can keep two parts from seating. Rust can hide damage. A coarse scratch pattern can show through paint. The next operation tells you how far preparation must go.
Good shop judgment has a sequence: notice the condition, decide what the work requires, then act. Here, that means you should remove the defect with a controlled preparation step before the next operation.
What does surface defects, rust, and finish preparation mean?
Surface condition affects how a part cuts, fits, joins, and finishes. Rust, burrs, splinters, chips, and rough surfaces can interfere with measurement or assembly. Preparation removes the defect with the right tool and leaves a surface appropriate for the next step.
Which clues should you notice first?
Start with the evidence you could point to in a picture. rust, a burr, a rough edge, a splinter, or a surface that will be painted or joined gives you a concrete reason to eliminate choices that cannot handle the stated job.
- Working clue: rust, a burr, a rough edge, a splinter, or a surface that will be painted or joined
- Best next move: remove the defect with a controlled preparation step before the next operation
- Why it matters: the right setup protects the work, the tool, and the person using it.
How do the close choices differ?
| Tool or idea | What it does |
|---|---|
| Coarse abrasive | removes material quickly |
| Fine abrasive | refines a surface after earlier preparation |
Think in outcomes rather than appearances. The relevant question is whether the job needs what Coarse abrasive does or what Fine abrasive does.
Put the clue into a shop decision
Imagine that a question or illustration gives you rust, a burr, a rough edge, a splinter, or a surface that will be painted or joined. Before you look for a familiar name, say what the work actually needs: remove the defect with a controlled preparation step before the next operation. Then test each choice against the physical result. A choice that cannot produce the needed result is out, even if it belongs to the same general family. This is also where the difference between Coarse abrasive and Fine abrasive becomes useful. One clear reason is enough to reject a close distractor.
Watch the skill in context
How to Prevent Rust and Maintenance Hand Tools by Wood By Wright ASMR is a useful visual companion to this lesson. Use this as a short observation exercise: identify the material, the action, and the control before you move on.
Use this four-step routine
- Identify the defect.
- Protect the part and your hands.
- Choose a removal method that fits the material.
- Check the surface before moving to the next step.
Try the decision, then check your reasoning
- You see rust, a burr, a rough edge, a splinter, or a surface that will be painted or joined. What detail should lead your decision? The condition that changes the tool choice or safe setup is the first clue.
- What is the best response when the task calls for rust, a burr, a rough edge, a splinter, or a surface that will be painted or joined? Remove the defect with a controlled preparation step before the next operation.
- How is Coarse abrasive different from Fine abrasive? Coarse abrasive removes material quickly; Fine abrasive refines a surface after earlier preparation.
- What should you do if the tool, setup, or workpiece does not match the job? Pause and correct the mismatch before applying more force.
Keep building your shop vocabulary
Use the ASVAB topic archive to move through the lessons in a practical order. Build speed only after you can explain the choice. Clear reasoning is what makes recognition reliable under time pressure.
Related lessons:

Related to This Article
More math articles
- How to Use Order of Operations? (+FREE Worksheet!)
- How to Pass the CLEP College Math Exam: Skip a Semester in 2026
- Converting Units of Weight/Mass for 4th Grade
- Demographic Transition and the Population-Resource Debate
- Free Grade 3 English Worksheets for Indiana Students
- The Best Grade 6 ELA Practice Tests for New Mexico Students
- Fraction Wizardry: How to Multiply Fractions and Whole Numbers
- How to Find Domain and Range of Relations
- Claim, Reason, and Evidence
- Top 10 Tips to Overcome FTCE General Knowledge Math Anxiety




















What people say about "Surface Defects, Rust, and Finish Preparation"?
No one replied yet.